To run our software on you will need:
From KinectSandbox ver. 1.9.7. software runs smoothly on integrated graphics - VEGA8. Tested on Ryzen 3 3200G
Computer:
Operating system: Windows 10 Home/ Windows 11
Processor: AMD Ryzen 3 1200, 3.1 GHz, 8MB
https://cpu.userbenchmark.com/AMD-Ryzen-3-1200/Rating/3931
Mainboard: Port USB 3.0, DDR4,
eg. GA-AB350M-DS3H V2
Graphic card: GTX 1030 2GB
https://gpu.userbenchmark.com/SpeedTest/283726/NVIDIA-GeForce-GT-1030
RAM Memory: 8GB DDR4
Hard Disk: SSD 64 Gb
Sensor: Kinect 2 PC, Kinect X-BOX ONE with PC Adapter
Projector:
eg.: Ricoh PJ WX5461, Acer P5530, Optoma EH400+, BenQ mh733
Computer:
Operating system: Windows 10 PRO 64 bit/ Windows 11
Processor: AMD Ryzen 5 2600X, 3.6GHz, 16 MB
https://cpu.userbenchmark.com/AMD-Ryzen-5-2600X/Rating/3956
Mainboard: Port USB 3.0, DDR4,
eg. Asus ROG STRIX B450-F GAMING
Graphic card: GTX 1060 3Gb
https://gpu.userbenchmark.com/Nvidia-GTX-1060-3GB/Rating/3646
RAM Memory: 16GB DDR4
Hard Disk: M2 SSD 256 Gb
Sensor: Kinect 2 PC, Kinect X-BOX ONE with PC Adapter
Projector:
eg.: Viewsonic PG800HD, Optoma WU515, NEC PE455UL
Software will also run on older machines like Intel i3 processor + middle class graphic card. Indispensable are: Windows 10, graphic card with DX 11 support, USB 3.0 port, Kinect 2, projector.
Projector picks for the by ar-sandbox.eu team UPDATE 11.10.2023
| ">Throw ratio | ">Image Offset | ">Brightness | ">Resolution | ">Lamp | ">LCD/DLP | ">Price est. | |
| ">Acer P5535 | ">1.13 – 1.47 | " data-sheets-numberformat="">132% | ">4500 | ">1920×1080 px | ">4000h | ">DLP | " data-sheets-numberformat="" data-sheets-formula="=R[0]C[1]/4,45">€796,40 |
| ">NEC ME403U | ">1.2 – 2 | ">ca 115 | ">4000 | ">1920×1200 px | ">10000h | ">3LCD | " data-sheets-numberformat="" data-sheets-formula="=R[0]C[1]/4,45">€960,45 |
| ">ViewSonic X2 | ">0.69, 0.83 | ">105 | ">3100 | ">1920×1080 px | ">30000h LED | ">DLP | " data-sheets-numberformat="" data-sheets-formula="=R[0]C[1]/4,45">€1 130,79 |
| ">Epson EB-1795F | ">1.04, 1.26 | ">3200 | ">1920×1080 px | ">4000h | ">LCD | " data-sheets-numberformat="" data-sheets-formula="=R[0]C[1]/4,45">€1 211,24 | |
| ">Optoma ZH420 | ">1.12, 1.47 | " data-sheets-numberformat="">116% | ">4300 | ">1920×1080 px | ">30000h Laser | ">DLP | " data-sheets-numberformat="" data-sheets-formula="=R[0]C[1]/4,45">€1 449,21 |
| ">Epson CO-FH01 | ">1.19, 1.6 | ">ca 100% | ">3000 | ">1920×1080 px | ">6000h | ">LCD | " data-sheets-numberformat="" data-sheets-formula="=R[0]C[1]/4,45">€482,92 |
| ">Panasonic PT-VMZ51 | ">1.09, 1.77 | ">lens shift | ">5200 | ">1920×1200 px | ">20000 Laser | ">LCD | " data-sheets-numberformat="" data-sheets-formula="=R[0]C[1]/4,45">€2 334,83 |
| ">Panasonic PT-VMZ61 | ">1.09, 1.77 | ">lens shift | ">6200 | ">1920×1200 px | ">20000 Laser | ">LCD | " data-sheets-numberformat="" data-sheets-formula="=R[0]C[1]/4,45">€3 143,82 |
| ">Panasonic PT-VMZ71 | ">1.09, 1.77 | ">lens shift | ">7000 | ">1920×1200 px | ">20000 Laser | ">LCD | " data-sheets-numberformat="" data-sheets-formula="=R[0]C[1]/4,45">€5 022,25 |
| ">Viewsonic PX706HD | ">0.69, 0.83 | " data-sheets-numberformat="">105% | ">3000 | ">1920×1080 px | ">4000h | ">DLP | " data-sheets-numberformat="" data-sheets-formula="=R[0]C[1]/4,45">€818,43 |
| ">Panasonic PT-VZ580 | ">1.1, 1.77 | ">lens shift | ">5000 | ">1920×1200 px | ">7000h | ">LCD | " data-sheets-numberformat="" data-sheets-formula="=R[0]C[1]/4,45">€1 301,12 |
| ">NEC P554U | ">1.2, 2 | ">lens shift | ">5300 | ">1920×1200 px | ">4000h | ">LCD | " data-sheets-numberformat="" data-sheets-formula="=R[0]C[1]/4,45">€1 280,67 |
| ">Optoma HD29HLVx | ">1.12, 1.47 | " data-sheets-numberformat="">116% | ">4500 | ">1920×1080 px | ">6000h | ">DLP | " data-sheets-numberformat="" data-sheets-formula="=R[0]C[1]/4,45">€822,25 |
| ">Benq MH733 | ">1.15~1.5 | " data-sheets-numberformat="">115% | ">4000 | ">1920×1080 px | ">4000h | ">DLP | " data-sheets-numberformat="" data-sheets-formula="=R[0]C[1]/4,45">€898,43 |
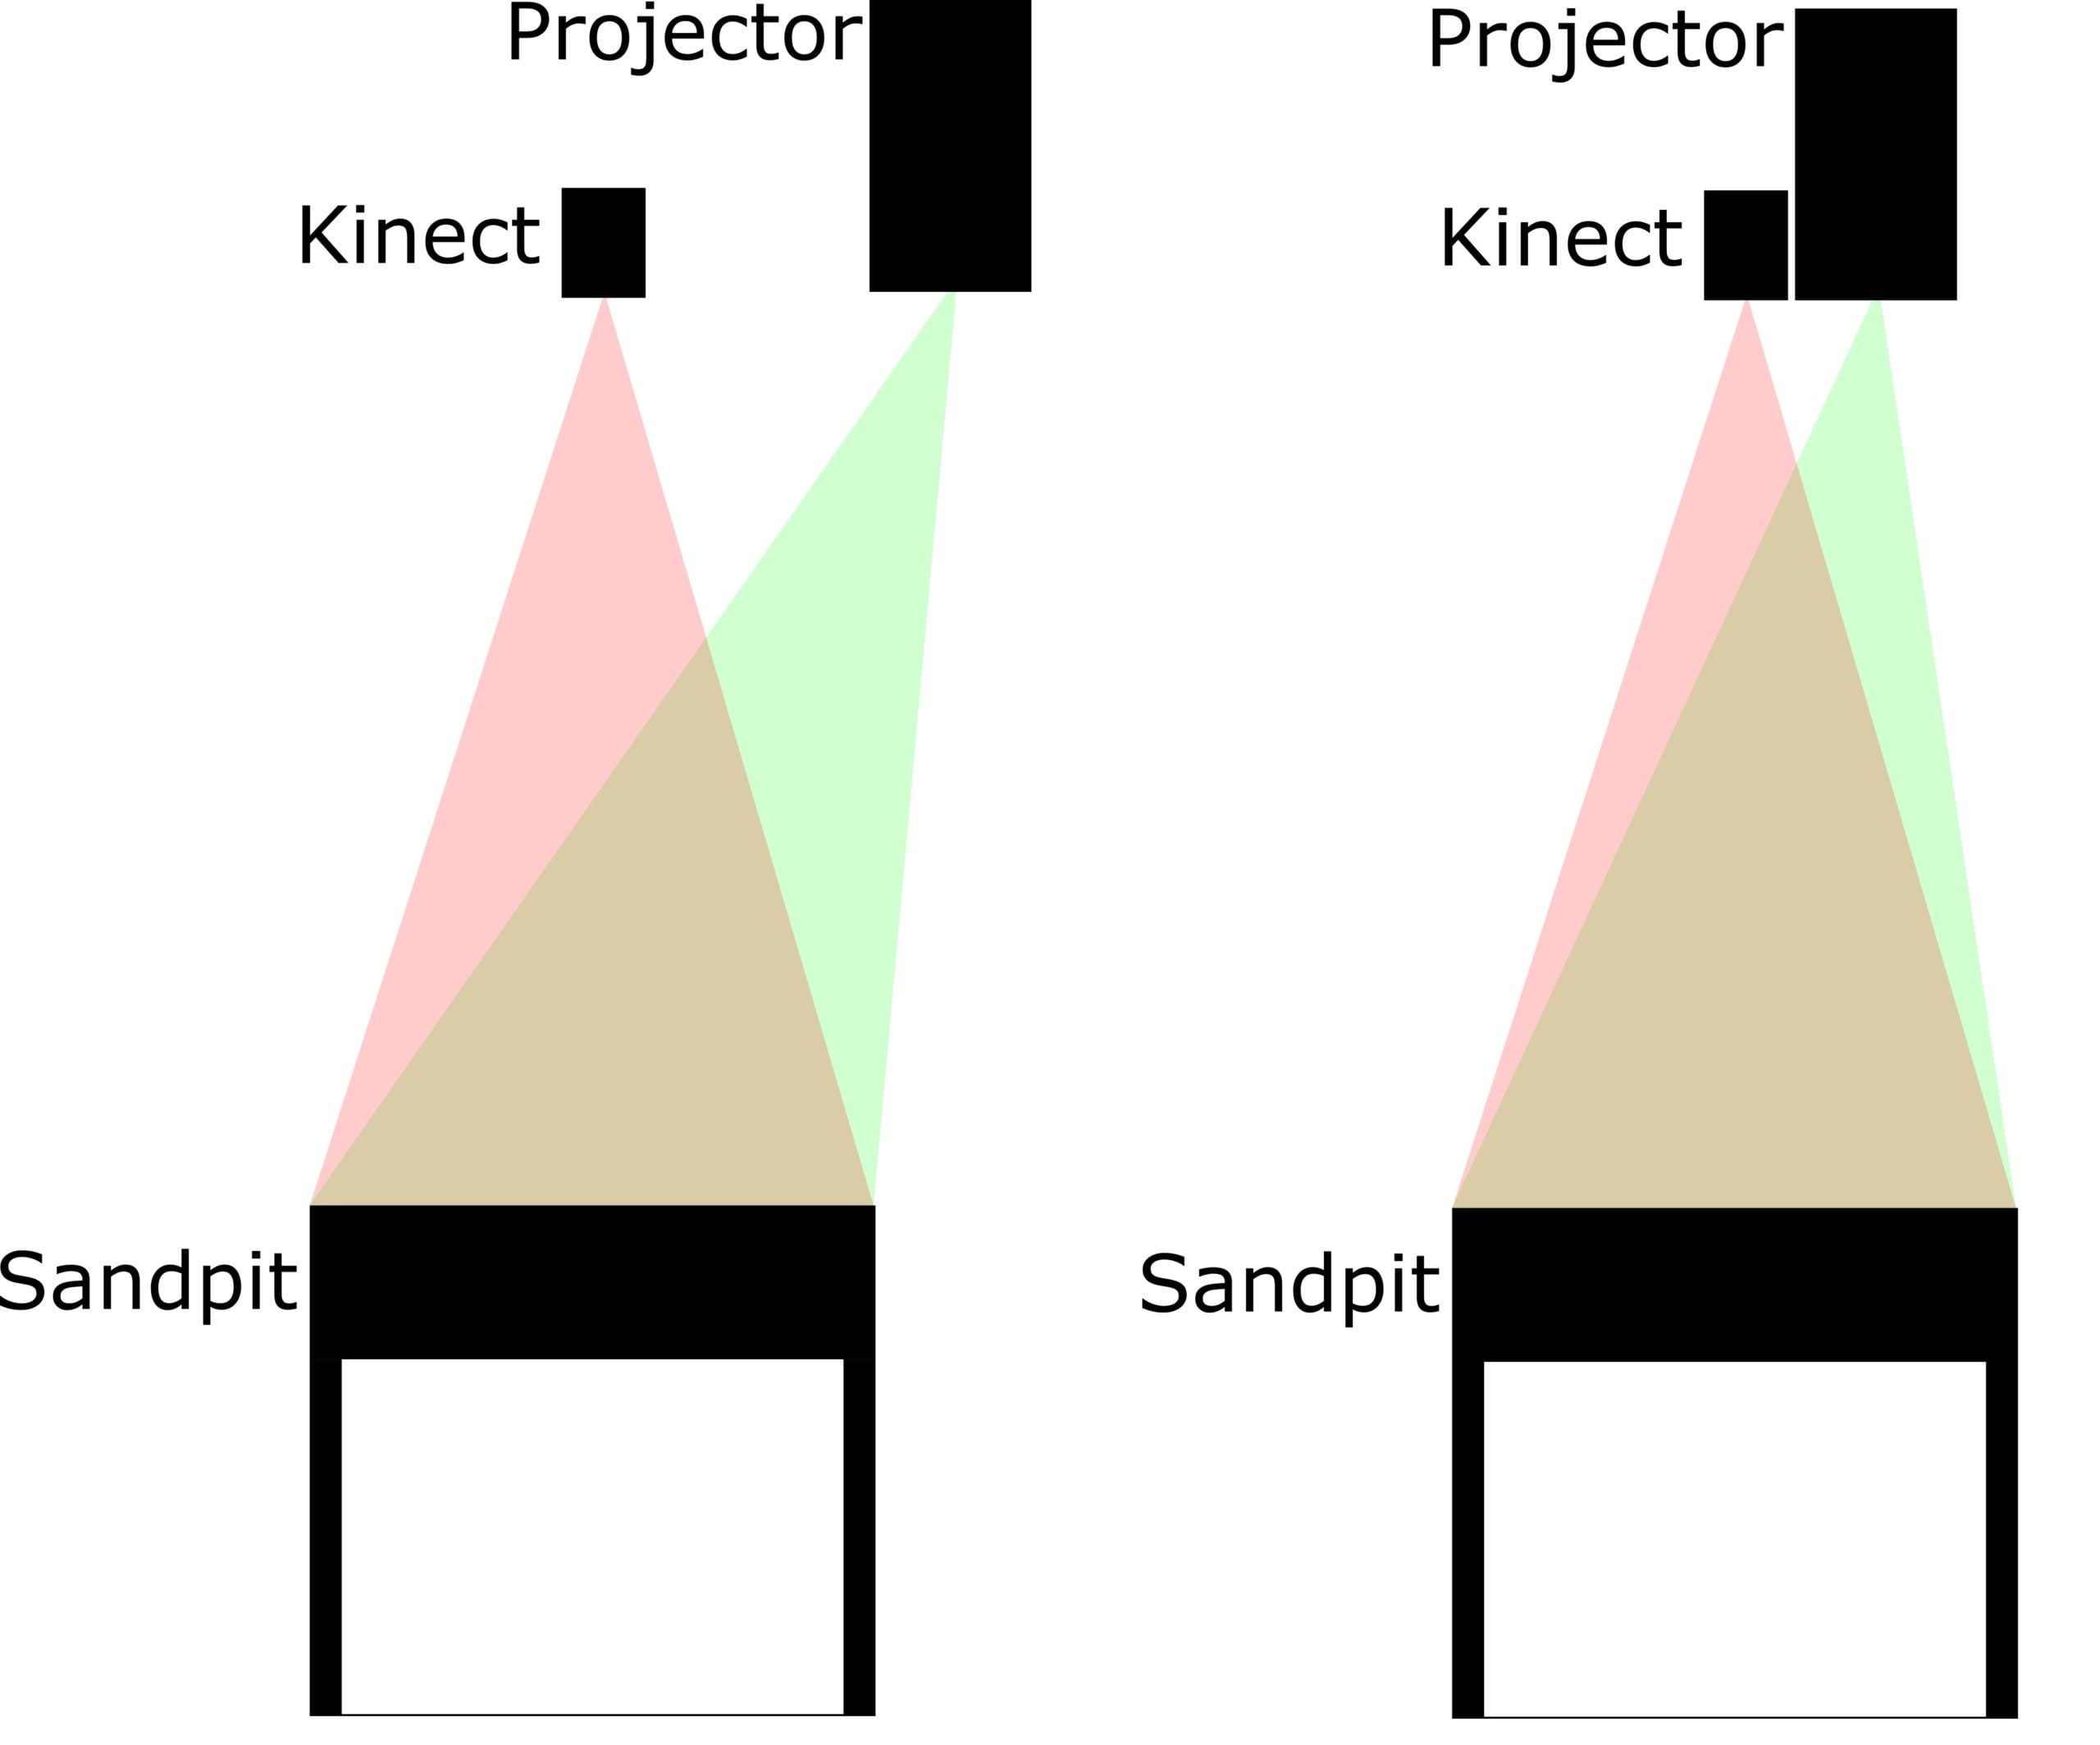
How to correctly place both Kinect sensor and the projector.

Sensor and projector placement without (left) and with (right) lens shift.
There are two things you'll have to bear in mind: the Augmented Reality Sandbox Software works best when the sensor is close to the light beam source and at the same time, it [sensor] should be placed approximately above the center of the sandpit. To meet both of these requirements we suggest using a lens shift projector. It may be slightly costlier, but will provide great quality of simulation and minimize errors.
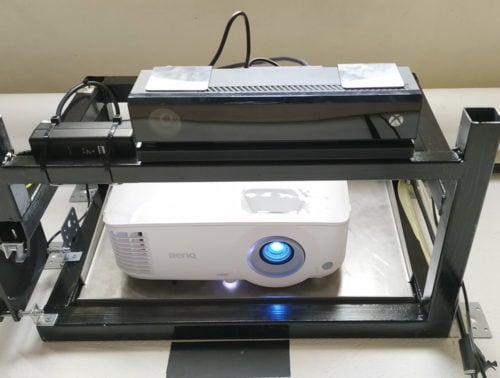
Having the projector and Kinect far apart may result in parallel shifts in the projection. Those are usually not significant, but visible. We found that the best way to avoid this issue is to mount a lens shift projector close to the kinect and place them above the center of the sandpit. Such solution is only possible with this certain type of projector.
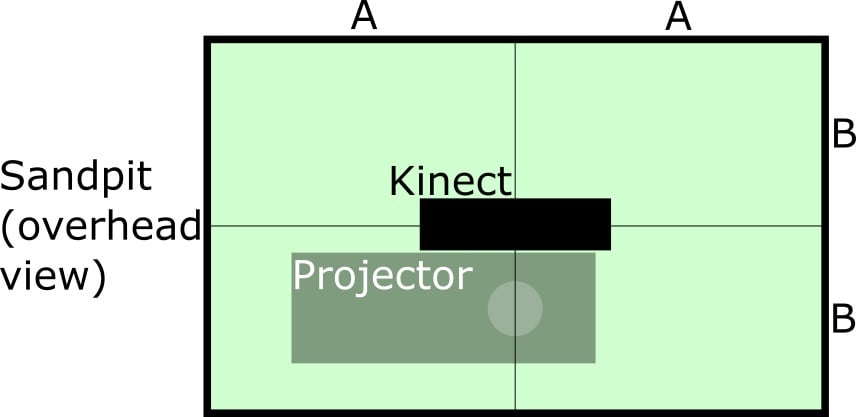
Remember that the Kinect sensor should be placed exactly above the center of the sandpit, facing downwards. See the overhead view image for clarification.
Drivers and packages necessary to run KinectSandbox and modules
Windows 10 Home 64 bit( 32 bit should also run) or Windows 11
Download and install:
To run export module you will need to install additional packages:
Before running our software check if your hardware is connected properly. Click the link to check problems and solutions when connecting the sensor.
Before you go to next steps check if software is working. Start software with given calibration. You will make your own later.press TAB
Step by step tutorial.

For best results the application requires scrupulous calibration. The outcome of the process depends heavily on surrounding conditions, especially the lighting. It should be constant, evenly distributed and very slightly dimmed, soft daylight-like.
Make sure there are no flashing lights nearby, such as TV screens, or faulty light bulbs. Also cover the windows in case weather conditions (clouds, etc.) could affect lighting in the room.
The areas right next to the sandbox have to be nonreflective – avoid things such as oil-painted walls or tile floors. If necessary, cover them with white paper sheets.
To correctly gather calibration data, sensor needs smooth, flat and preferably white surfaces.
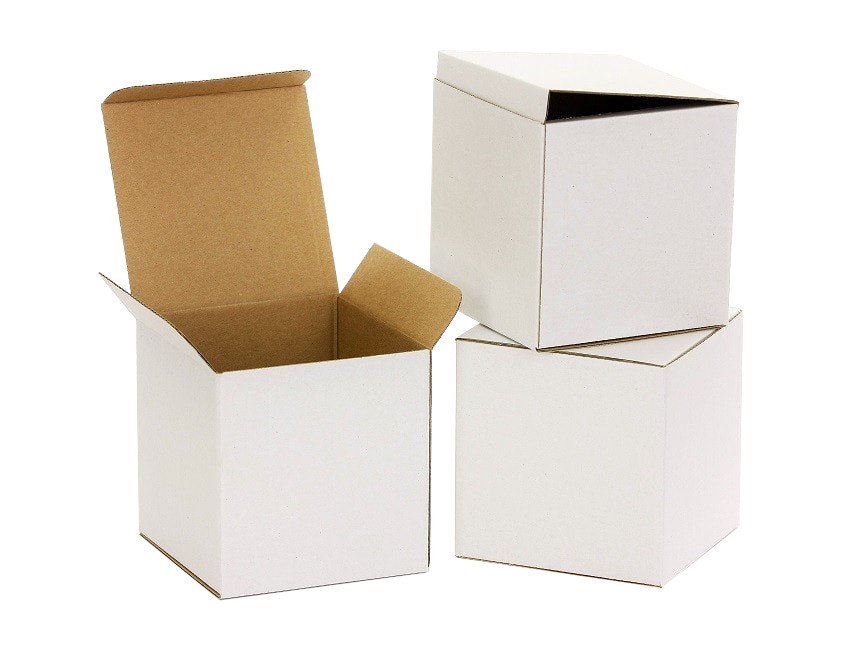
Our suggestion is to use cardboard boxes of three different sizes listed below. They should be arranged so that the edges of the same length contact each other and only the height varies. It’s best to not leave any gaps between boxes, however if they occur (eg. because of size of the sandpit), fill them with white paper sheets, so that the lowest surface is also plain white. Also, keep in mind that the boxes should cover all the space lit by your projector and ideally even stick out a bit.
Box 1 – 20x20x20cm
Box 2 – 20x20x15cm
Box 3 – 20x20x10cm
Use this scheme to set up the boxes, starting from the edge of the sandpit:
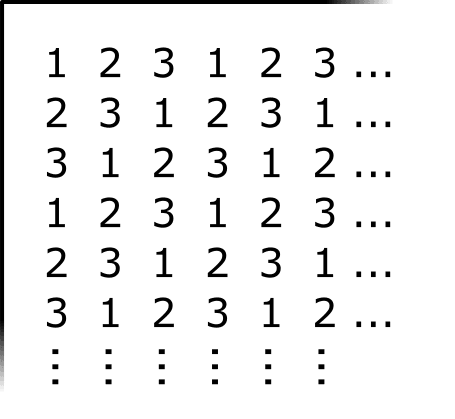
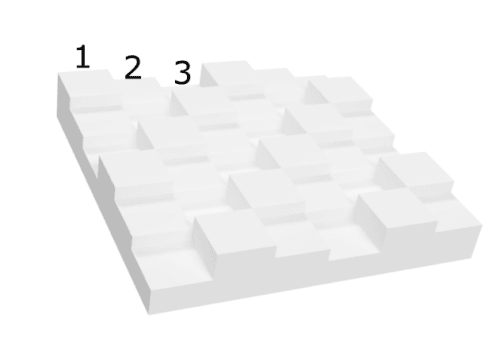
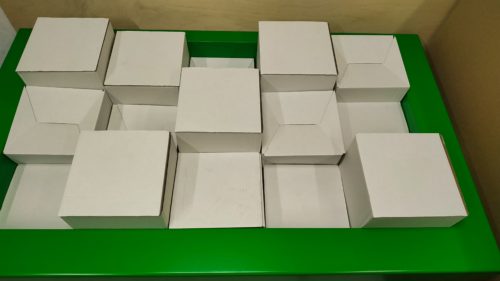
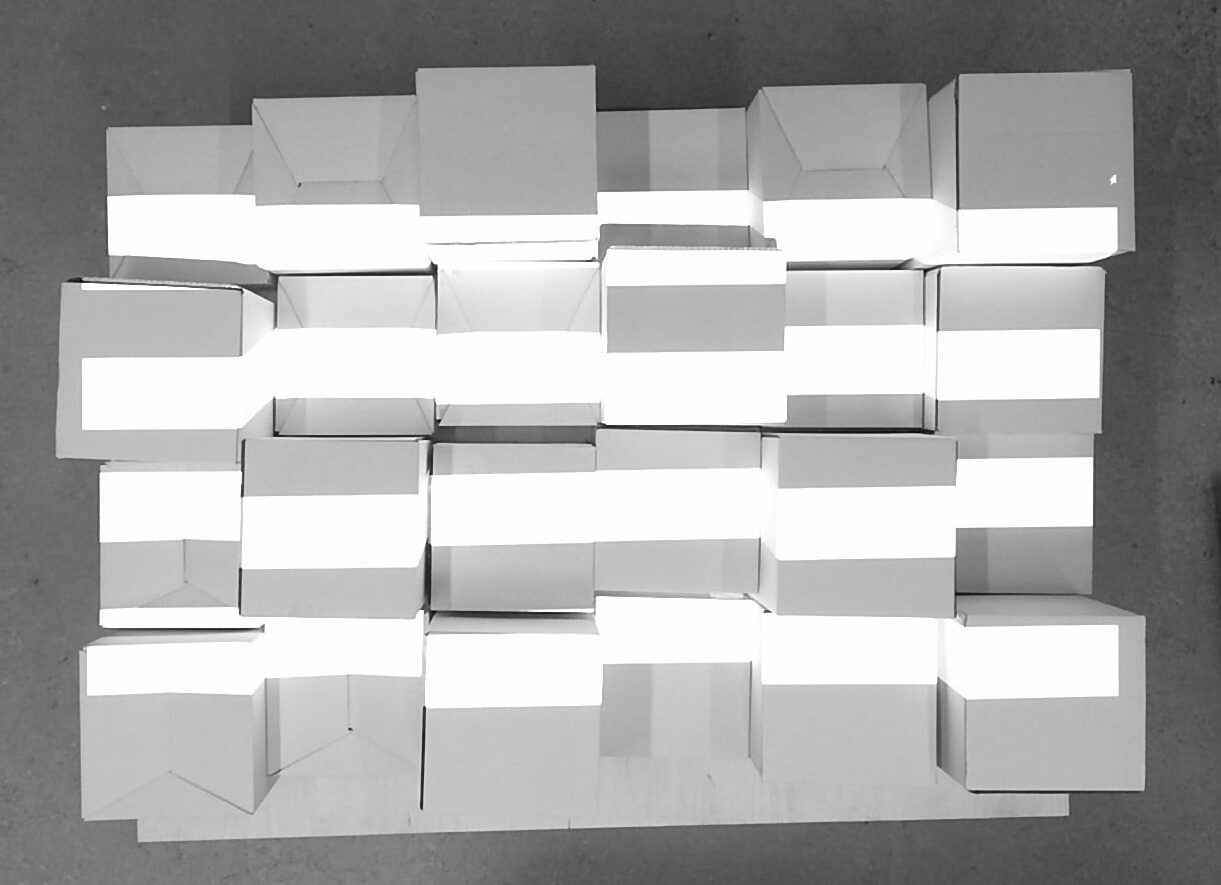
During the calibration process you should be able to see a changing pattern, looking like the one on the right. Make sure it is on top of the projection and no other window is displayed above it.
Before running the calibration check if your display’s resolution matches that of your projector.
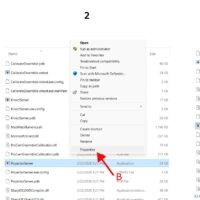
When using Windows 11 operating system you need to run ProjectorServer server in “compatibility mode”
Right click on the AR_Sandbox_Calibration\ProjectorServer.exe
Windows 8″ and check boxes: “Run us administrator” and “use legacy display ICC color management’
Calibration automatic mode:
Calibration manual mode:
Troubleshooting
It may happen that the calibration process doesn’t immediately give perfect results. This is mainly because it uses and depends on physical objects and can be affected by their imperfections. Usually it’s a matter of few simple steps to reach the wanted level of accuracy.
Should you still have problems with your calibration, keep the old and new calib files and contact us at [email protected]